Translate

Tuesday 22 April 2014

Merging photos and edit tones (Ngguyang Kebo)

Merging Two Photos.


-->

This time I will try to describe some of the combined tutorial I've written in this blog, among others.

1. Combining two photos
2. Ray of light
3. Edit Tones Photo

for starters below I show two images, photos and pictures for the background after doing the editing.


Starting the process of photo editing

Stage 1.


Making Fog for the background image (background),
(I use this to highlight the POI later) and so impressed cooler
Fog of making this, we just played Brush by using white color,
brush with a fine in the area that will be created Fog.


after completion brush strokes, the results before we make more subtle, by clicking - Glausian Blur, as shown below.

Sunday 20 April 2014

"Desire "

"Desire"

To make the picture "Desiree" , Merging two photos


Addition Brush - Birds 
To add a strong character photo


Friday 18 April 2014

Tutorial sketching, with Photoshop

Tutorial sketching


-->
In this tutorial I will try to give you some ways to change the style of a photo into a painting as if the hand with a pencil or pen
Foto awal dan hasil akhir


first of all download first Brush (photoshop) to create a sketch pencil.

Download Brush sketch 1

Download Brush sketch 2


I apologize in advance, because I use to edit photos, not my photo, but I took in the free stock photos, "Rachel Weiz" because I do not ever want to change the photo pretty girl ... hehehee ..


Tutorial still in Indonesian language. I have not made ​​in English


Thursday 17 April 2014

Behind The Making of Photos "Snoop" - The importance of the concept of a work photo

Behind the making of Photos "Snoop" - The importance of the concept of a work photo


-->


Before starting to produce works of art , with the intention we should be able to understand how to work , and workflow , as well as the priority , for a concept . Therefore, it is important to define the concept , and build the basics of editing .
For me , the concept is important , because without it is not possible to express my ideas and provide images in my imagination and how to realize them .
For this reason , we can not cover it , and as I have heard many colleagues , they refuse to understand the technical process , because his artistic vision does not allow them , to spend time , or the importance of learning need .
I do not think so , the lack of skill in the art is the artistic limits . Art is known to be enjoyed , and art can be contradictory in its interpretation , so we will try to maintain a balance between the two sides of the balance .
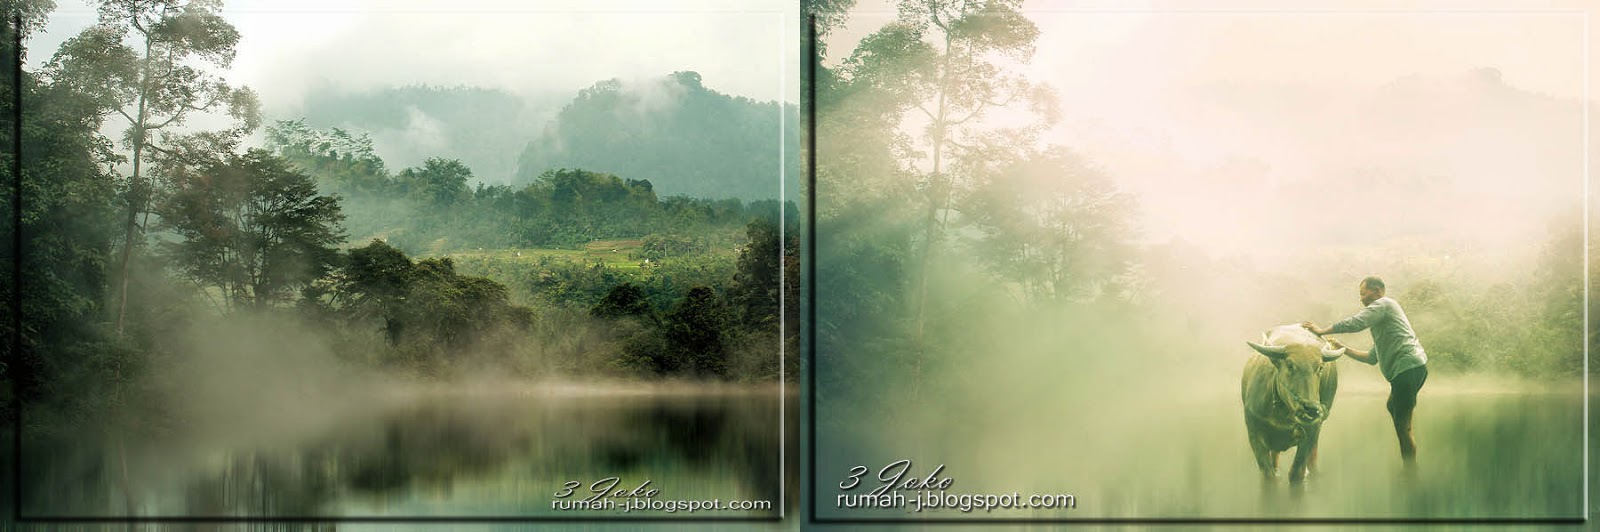
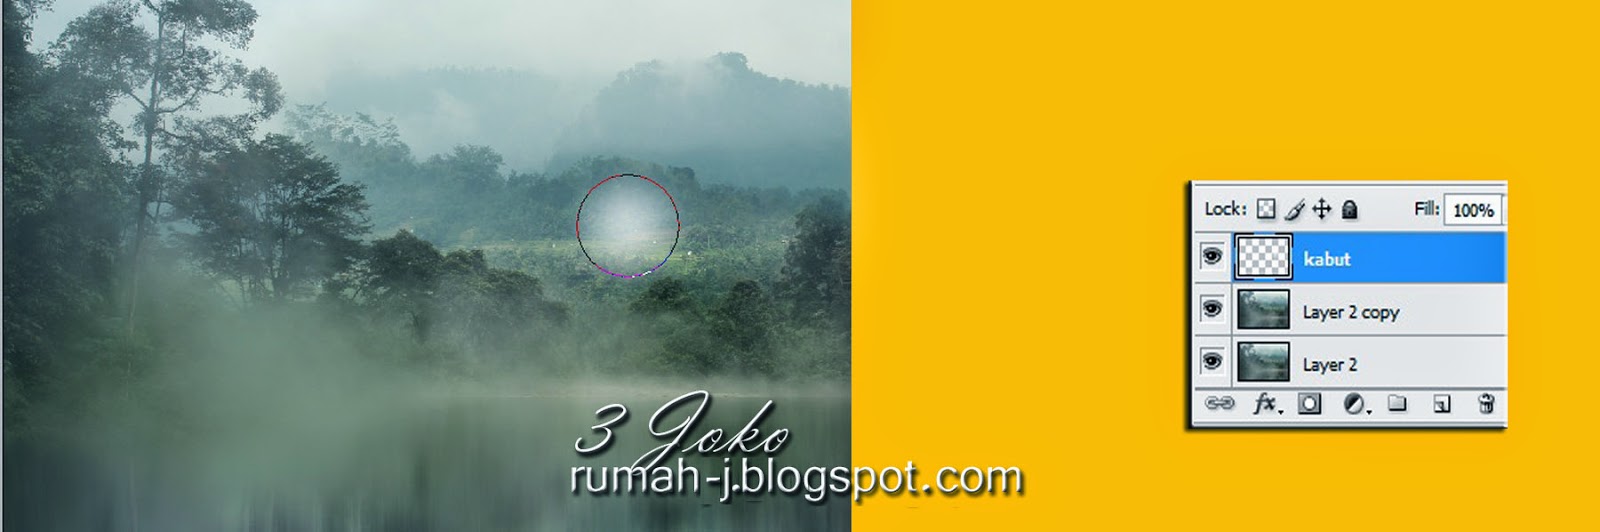
In this case , we will try setting the basis of a photograph , to achieve optimal results than expected when shooting " snapshots " or concept to obtain the desired image for the process of editing a work

as in the case of Photos "Snoop" 
before doing the editing, I already have the basic concepts will be the story of this photo. contained in the idea in my head

before this photo so, as the work of "Snoop" is, in imagination, or concept in my mind has been imaged, a painting of a little boy with a cat looking out the sweetness.

The process of shooting is done two times, with a slightly complicated process. because we have to drive a little child who is 18 months old and a cat.

1. A little Girl shooting 


In this case my daughter, who was 18 months, I tried to describe earlier concepts, and making my son look as natural as possible, I have done this process many times, and finally got a portrait that is consistent with the concept ... I did my first photo with:

camera Canon 550d
Lensa Canon 18-55mm
Data


-->

2. Shooting second, with the same location and at different times.


a pet cat who became the second model .. This process is no less difficult, because we have to drive a cat, to get an expression like the first photo shoot .. helped my son who was 7 years old, to hold the cat, that docked in the garage fence .. . done several times shooting, resulting in a picture like this.

Wednesday 16 April 2014

Change the Background of a Photo


-->
Change the atmosphere by replacing / editing background

Original photo
Photo Edits and this results in buying By 3smobile.com


http://rumah-j.blogspot.com/2013/05/merubah-background_20.html

Stage 1. 


Do it the Double layer (Ctrl + J)

after a photo of his background will be changed (the original photograph), 
create a double layer on the photo or press (Ctrrl + J)

Stage 2 


Motion Blur

after a 2-layer, then the next stage, 
top layer is made motion blur, (Click Filter-blur-select Motion Blur) 
results are as shown below


Stage 3.


Proses selection

Do it like the first stage, a copy of the background layer on the bottom layer, with (ctrl + J) to do the selection process / eliminate backgraound


The result, then layer the selection is placed on the top layer

The result will be like the image below


-->

For more details the Tutorial, open the rumah-j.blogspot.com

==== semoga bermanfaat ==== 


Saturday 12 April 2014

Simple Merging two photos

Simple Merging two photos 


"Singing with the Deer" 


The results of these edits on Display in Greece (A cafe "Down Cafe" at Instambul, Turkey) a cafe that accommodate people with disabilities to work there .. its inauguration by the mayor


The resulting simple photo merge two photos .. to get a different story from the original photo

-->

Stage 1

This photo with a concept, before did a shot photo.
in my first photo shoot of my son who was singing in a forest in the area of ​​Gunung Kidul Wonosari.
The second photo,I shot at a captiva deer at Gadjah Mada University of Yogyakarta

Black background (Make a photo with a dark background)

Dark Background

This time I tried to explain to make a picture with a dark background.
several ways to produce images with a dark back lata:
1. Photo by isolated object and replace the screen with a dark,
2. Photo that in settings in camera and location shooting,

Stare 

Examples of the photo below, the result of setting the location, because this little boy sitting in front of the door, with a background of a dark little room, with dark ground floor, with the use of Flash (which is at a low setting) from the side, will produce light side with a dark background. but there is little in this photo editing process to remove the exposed areas of Flash (Floor slightly lighter)


I use a regular camera is not DLSR

Canon Powershot S5IS
speed of 1/100
F = 3.2
iso 100
location: My Home

Wednesday 9 April 2014

Tutorial make Ray of Light in the sky

Ray of Light 

sometimes we want a photo with the look of ROL (Ray of Light) to look more dramatic. but for the moment as it gets extremely difficult, should the clouds and weather conditions that favor. (hope appears light ROL) This time I tried to make a tutorial how to create ROL with Photoshop

Stage 1.

prepare a photo you wish to edit.
This time I use 2 pcs photo
 rol

here other than I'll make a tutorial to make ROL, and tells how to change the clouds on a photo.

Stage 2

Combine first and second photos into one
using drag images to the image layer 1 to layer 2, the results are as shown below

 ROL

Put the sky layer (be layer1) layer on top of the child who ran (background)

Tuesday 8 April 2014

"Eyes" The Secret of Eyes in Portrait Photography

"Eyes" The Secret of Eyes in Portrait Photography


-->


After seeing many photos that I have made, both which I edited with photoshop or no editing done at all. This time I wanted to make this photographic guide, for the purpose of assisting colleagues, where possible with the knowledge that I can give a little bit of an idea how to edit images with a software (Photoshop) 

this time, maybe just a little Edith to make corrections, but the results will be very different and more artistic and more inside. (in my opinion) 

in science photography Portrait explained that a photograph is determined by the spirit of a "Eye", because just look at the portraits with the eyes of the object, we can think and explore the soul of a photograph. 
emotions will shine with a focus on the "eye"


the above will explain how differences in photo 1 and photo - 2.
('Auryn' My daughter as a model)

Picture-1 

if we look at the Picture-1, then we will see the whole photo. because there are no major visible image,other than from the portrait itself, all the same Black and white.
but different if we look at the Picture-2.

Monday 7 April 2014

Black And White Tutorial

Black And White Tutorial Photography

Black and White photos or B&W does have its own uniqueness . Elements in black and white photography can reinforce the impression of dramatic , mysterious , and elegant .

Currently making Black & White Photos can be done quickly and easily . The digital camera also contained monochrome shooting facility .

but if we take pictures more freely premises colored format .. This will provide more flexibility in the process of making black and white photos .

-->

Some tips for taking photos of Black & White

Black and white photography is about capturing the object of black , white tone and tone them . Look for objects that contain a real difference in black and white , because the objects that contain high contrast would be a nice black and white photo to be seen .
 Black And White

1. Seting iso as low as possible .... ( to reduce Nois in the photos )


2. Focus on tekture


Black and white photos will be noticeably stronger with the textured object

3.Fokus in contrast


Black and white photography is about capturing the object of black , white tone and tone them . Look for objects that contain a real difference in black and white , because the objects that contain high contrast would be a nice black and white photo to be seen .

Wednesday 2 April 2014

Change the tone of a photo

An easy way to change the tone / color on a photo
can be done in several ways,
1. Color balance
2. Selektive color
3. Variation
such as one of the following ways:
Variation


as shown in the picture